stewartpatterns.com
  • Home
  • Stewart Patterns blog
  • Big Ben
  • NYC work
  • Custom Bronze Hardware

#23 Building big ben, part Two

11/7/2014

0 Comments

 
The work volume in my studio had always fluctuated from zero to overwhelming, and never predicable. For years, though, I had regular industrial customers that seemed to show up almost daily with projects and problems, most of which I would do immediately, often priced at time and materials. It made a great baseline from which to do the crazier projects and live some semblance of a normal life. Still, a project like Big Ben is a 1500 hour elephant dropped into a small life. Things get a bit weird, customers get stalled, holidays put off, friends ignored. Heady times.

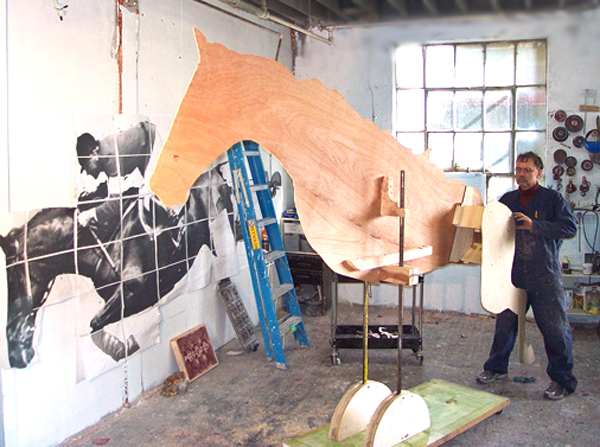
After blowing up the photo to life size, I traced the outline onto a couple of sheets of 6mm plywood, joining the pieces with a few strips of other wood. The point of the construction was to make it all capable of being burned out, as this was to be cut into pieces and cast in lost wax.  Where possible, I glued wood together.

Picture
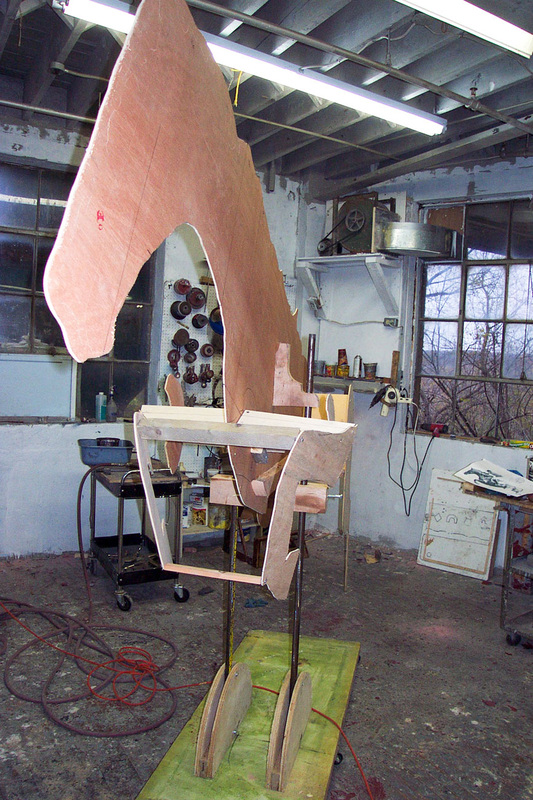
Adding extensions to the silhouette. I made new silhouettes of the legs to include internal joints, then fastened these to the extensions.
I next built a rolling stand that would allow me to move the whole master up and down, and tilting forward and back to allow for work on detail without a ladder.  I joined the plywood silhouette to the stand to allow for some movement. 

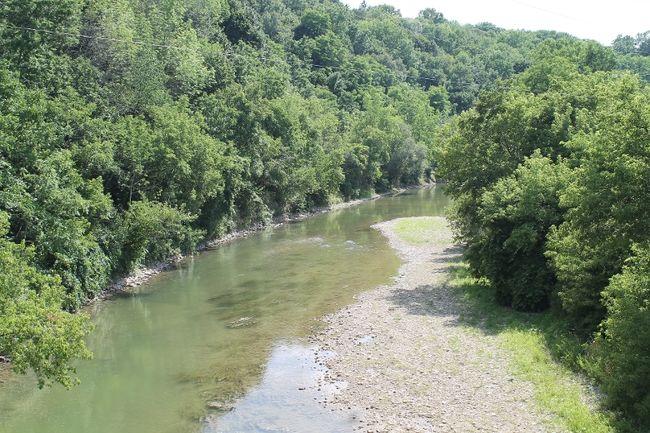
My studio was only 2000 sq ft, with room required for machinery and lots of other activities, so the rolling feature is something I add to everything possible in the studio. At the time, I had access to an adjoining empty room, so, in short order, I could swing all my storage and work benches into that room, leaving a blank space of about 600 sq ft with windows two sides. It’s been great, working every day on the bank of a lovely, treed river, high enough up to catch breezes.

Picture
Roughly the view from my studio, down the Nith River, in the heart of New Hamburg, Ontario. The river will rage at times, and sleep others.
Picture
Another view of the internal structure, showing that roller base that allows the whole thing to be raised or tilted.
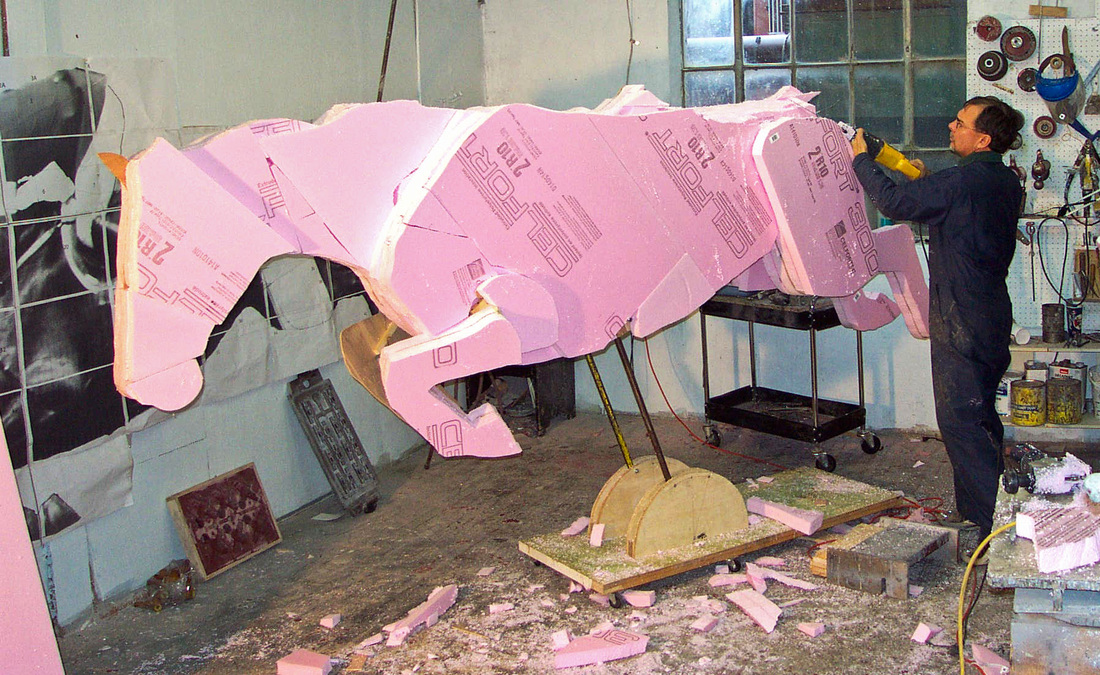
My cutout taken directly from the photo was my standard edge. I knew that, regardless of the third dimension, that all details had to match this pretty closely. It took a lot of staring at photos, a lot of measuring, to determine how far to offset the legs, establish hip bone placement, and even the width of the head. I roughed these dimensions in and mounted the legs onto the extensions. Now I could start gluing on Styrofoam. I don’t know how many boxes of hot glue I used. A lot. I had two guns on the go at all times.

Picture
Most of the styro has been glued on. The plywood cutout is buried along the edges of the styro. If I cut into the wood at any time, I'd be cutting off part of Big Ben. I'm starting to use my recipro saw.
Did I mention that this was fun? It really was, building a horse. It probably took no more than a few days to go from the outline to the rough volume of Big Ben. It feels great to create this size of an object as directly as possible.

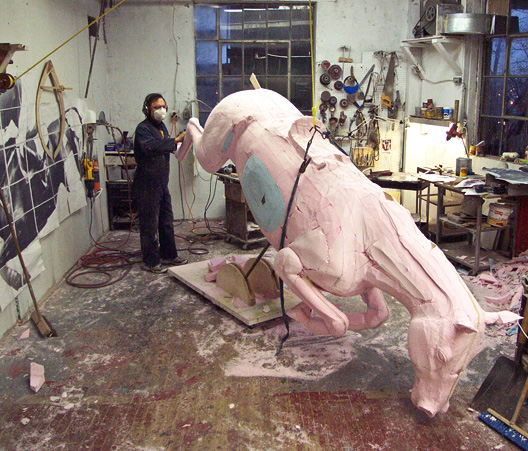
Next step was to grab saws, an electric chain saw, a recipro saw, and my 4 ½” grinder with 20-grit discs. All kinds of effort with large muscle groups, a few brain cells engaged, styro beads everywhere, especially in the corners of the eyes and in the underwear. Lots of noise, of sturm und drang. Some pauses, staring at photos, wondering what the heck was happening between skin and bone.
Picture
Big Ben tipped over to allow me to get at the back legs. I'll bet there are a few farriers out there that would love to have this feature built into real horses.
I didn’t pause very long to consider how I was going to learn equine anatomy in a week. Not knowing is a kind of special skill. I just blasted away until I couldn’t see any more what was going on. At that point, I melted a pail of cheap wax, hoping that a more reflective surface would reveal the true Big Ben lurking somewhere. It didn’t. It just made the studio smell bad for awhile.

I needed a miracle, I guess. Without knowing what I needed. One arrived.
Or two.

Continued in Part Three.
0 Comments


Leave a Reply.

    stewart smith

    I'm a woodcarver, turned sculptor, and morphed into a pattern-maker for cast metals. These days I hesitate to define my work, avoiding words like 'artist' or 'craftsman'. I just love designing and making things, keeping a bit of time free to downhill ski, paddle my kayak, and sing with my fellow choristers.

    Stewart Smith
    Stewart Patterns
    New Hamburg, On 
    email stewsnews@gmail.com

    Archives

    November 2014
    August 2014
    July 2014
    June 2014

    Categories

    All
    Bronze Tile
    Cast Aluminum
    Cast Bronze
    Cast Iron Restoration
    Cast Metal Design
    Custom Bronze Door Pull
    Custom Cast Bronze
    Custom Cast Hardware
    Custom Medals
    Digital Sculpture
    Historic Restoration
    Hollywood
    Margaret Atwood
    Memorial Bronze
    Mestrovic
    New York Parks
    Pewter Casting
    Sculpture

    RSS Feed

Powered by Create your own unique website with customizable templates.